
MatrixPro Tutorial - Creating AVL tree example
Description
In this tutorial, you will be shown how to create a simple example of AVL tree. The things you should learn in this tutorial are:
- Inserting structures
- Creating basic examples using drag&drop operations
- Using the insert -routines of the Conceptual Data Types
- Modification of the automatically created animations
- Saving animations
Initial setup
Start by launching the program/opening a new window. Insert a Table of Keys (from menu Structures/Utils or shortcutkey CTRL+9) and an AVL Tree (from menu Structures/Conceptual Data Types or shortcut key CTRL+7). Now the window should look like Figure 1.
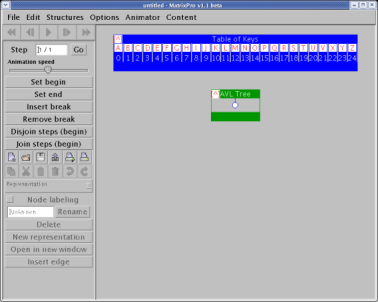
Figure 1. The initial setup in this tutorial.
Creating animation
Keys can be inserted into the AVL tree by dragging them from the Table of Keys and dropping them onto the AVL tree. To use the insert-routine of the AVL tree, the key must be dropped onto the tree, not a node in the tree. Figure 2 illustrates the difference.
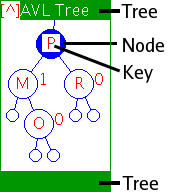
Figure 2. Key can be inserted into the
tree by dropping it onto the top or bottom bar. Key can be inserted
into a node by dropping it onto the node.
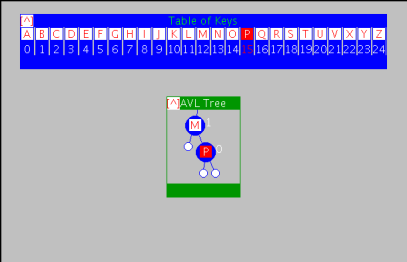
Now, insert the key M into the AVL tree. After this the tree should look like the one in Figure 3b. In the same way, insert the keys P, R, and O into the tree. The animation can be browsed backwards and forwards by using the animator panel or the shortcutkeys (Ctrl+Left arrow and Ctrl+Right arrow). The animation should have four steps (and five states) and the sequence should look like the one in Figure 3.
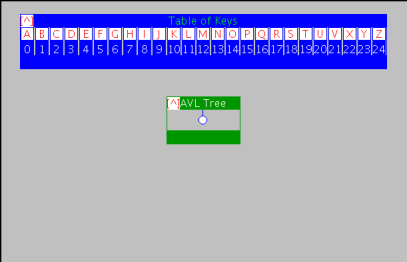 | 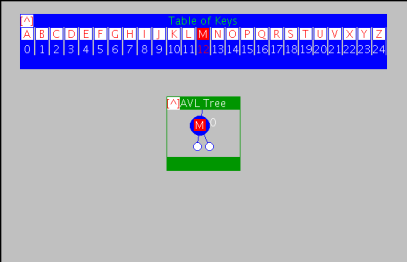 |
| (a) State 1: Initial setup | (b) State 2: After the first step, key M is inserted |
 | 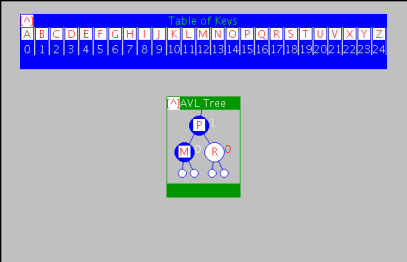 |
| (c) State 3: In the second step, P is inserted | (d) State 4: After the third step, R is inserted and a single rotation occurs |
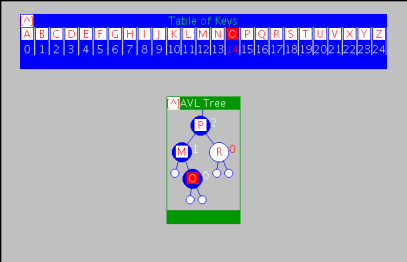 | |
| (e) State 5: Finally, key O is inserted |
Modifying animation
Although the animation in Figure 3 could be used to teach the concept of AVL tree, it fails to properly visualize the rotation that occurs when inserting the key R. This problem can easily be solved by modifying the animation created in the last section.
There are several ways that the animation can be modified. In this tutorial we will use the following buttons of the toolbar:
| Button name | Description |
| Insert break | With Insert break button a new break in the animation can be added. This means that the animation will promote the given step as a top level step and make the animator stop at this position when moving with the Backward and Forward buttons. This command can be undone by selecting undo. |
So, now we want to insert a break into the animation so that the state before the rotation is also shown. First, go to step number 3 either by using the backwards and forwards functionality or by typing 3 into the step box. Now, you should go to step 3.2.8 in which the key R is inserted into the new leaf node, but the rotation is not yet performed. This can be done by moving atomic steps forward using the Microstep forward toolbar button or by holding the shift-key while pressing forward.
Step 3.2.8 should look like the one in Figure 4. Now, press Insert break and a new break is inserted and the animation is rewinded. As you can see, there are now six steps in the animation sequence and the fourth step is the one that was at step 3.2.8.
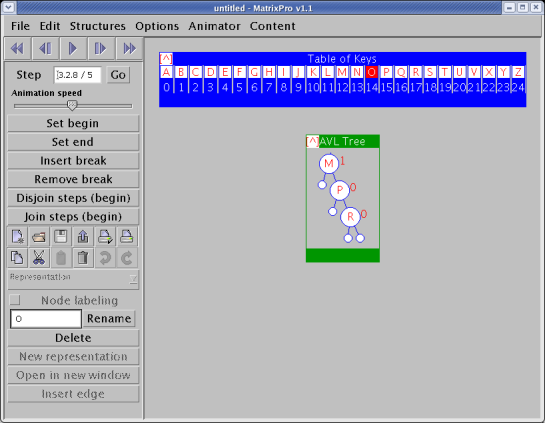
Figure 4. State where
break should be inserted.
You can now control the animation from the beginning to the end and see how the rotation is split into two separate steps. In the first step, the key is inserted at the correct position in the binary search tree, and in the second step, the bottom-up balancing is done by performing single rotation in the first unbalanced node M.
Saving
The animation can be saved by selecting Save as.. from the File menu (or by using the CTRL+S shortcut). This will open a dialog like the one in Figure 5. In the dialog you can select to save the structures either as Serialization or as ASCII. The type can be set from the Files of type drop-down list. By selecting Serialization the animation in the current active window is saved. When using the ASCII format, the structures in the current window are saved in an ASCII file.
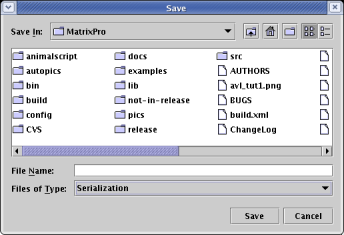
Figure 5. The Save dialog.
Now you want to save the whole animation to be used later, so you should select the Serialization (which is the default format). Select proper directory, type a name for the file in the File Name textbox, and click Save. Now the animation is saved and can be loaded by selecting Open from the File menu (or by using the CTRL+O shortcut).
This example as an exported SVG-animation is here.
The next tutorial will teach the exporting features of MatrixPro as well as the usage of the exported SVG-animations and LaTeX-pictures.
This document last modified 2006-04-25.
<URL: http://www.cse.tkk.fi/en/research/MatrixPro/tutorials/avl_tutorial.shtml>